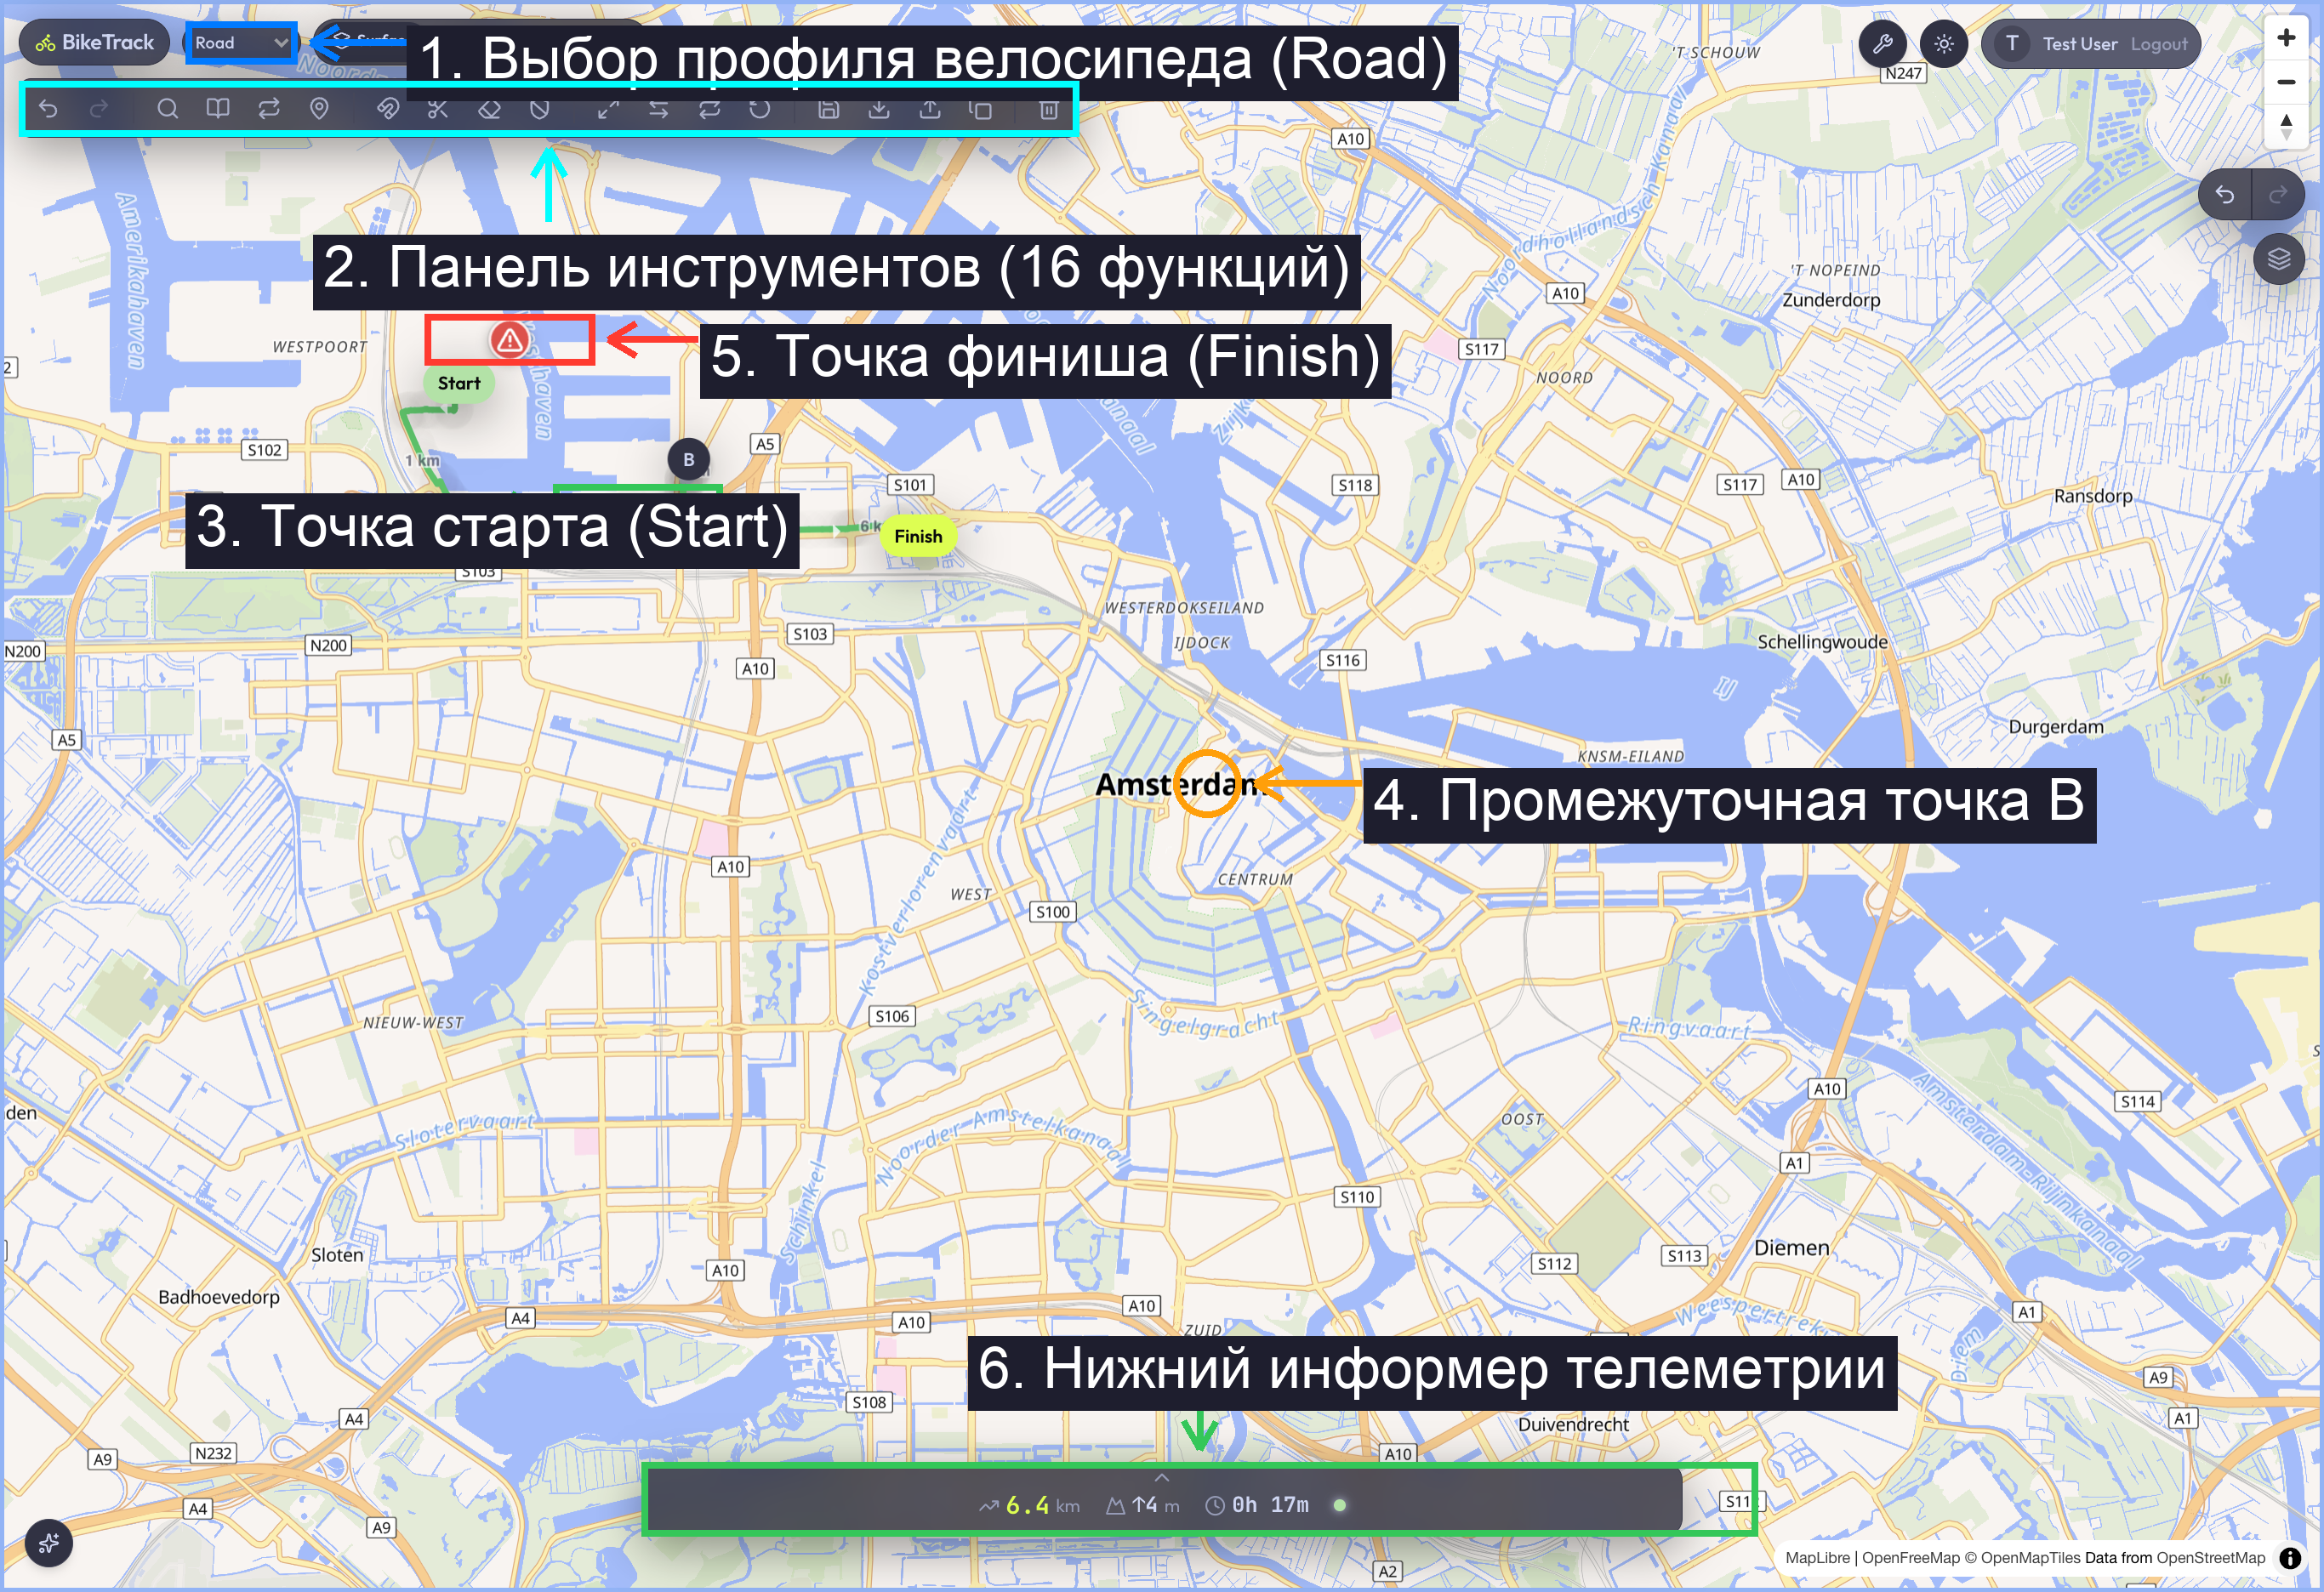
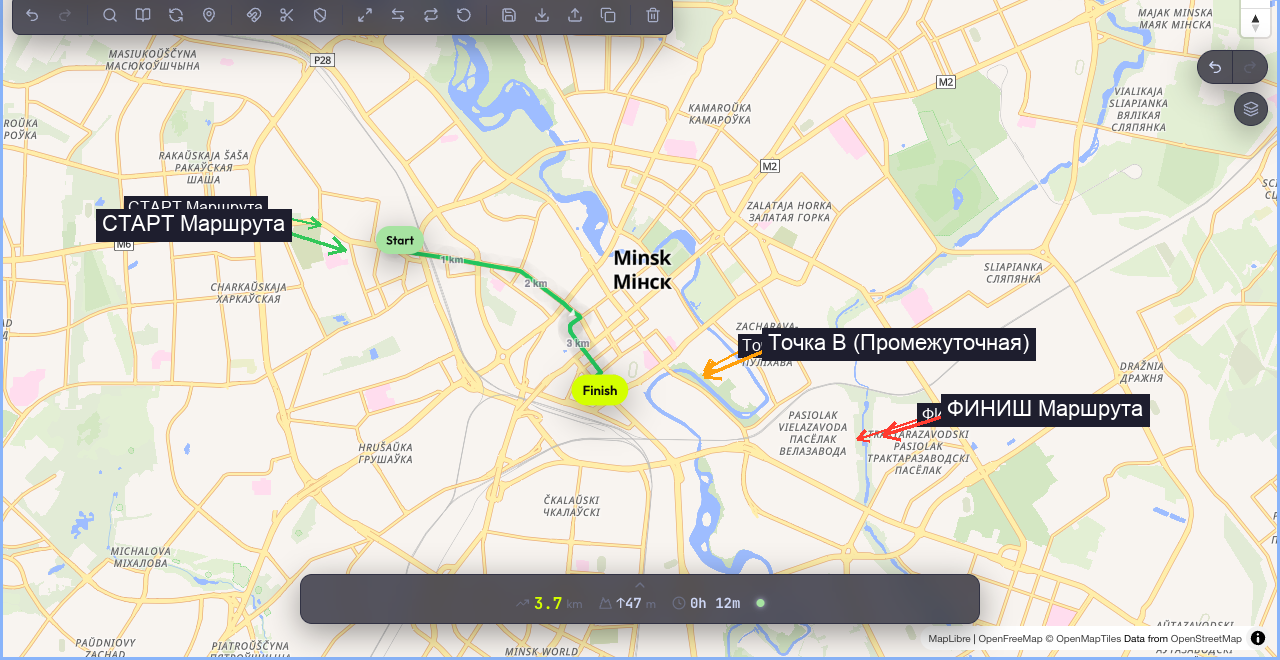
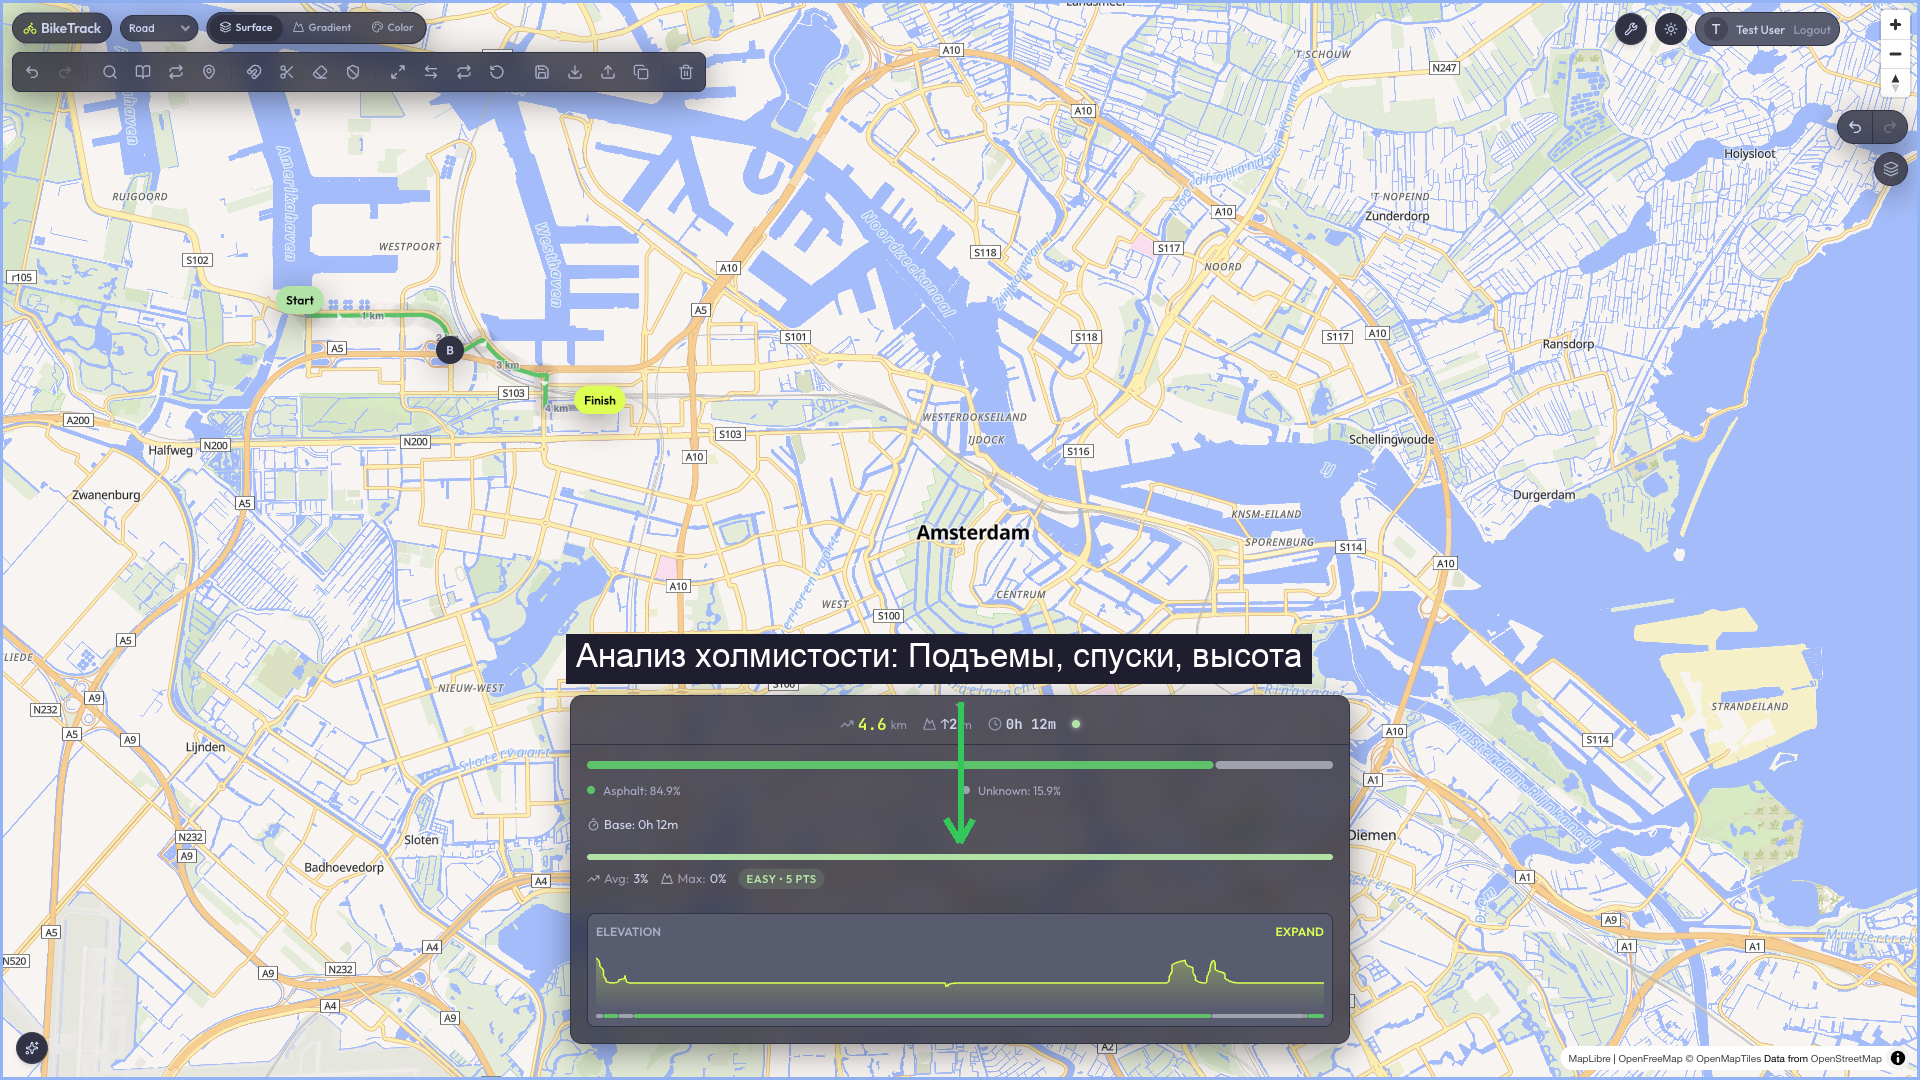
Appearance
🗺️ Feature 01: Route Planning & Waypoint Navigation
NOTE
🧭 Navigation: 🧩 Features Index | 🚲 Wiki Home
The Route Planning module is the central engine of BikeTrack V2. It enables cyclists to design optimized route layouts on an interactive MapLibre GL canvas using advanced routing profiles, instant telemetry feedback, and PostGIS spatial persistence.
🔍 How it Works (Product perspective)
- Interactive Node Placement:
- Left-clicking anywhere on the map grid instantiates a green marker representing the starting waypoint.
- A subsequent left-click places a red marker representing the terminal waypoint.
- Intermediate clicks on the map canvas dynamically insert numbered blue numeric waypoint pins (
1,2,3) sequentially along the active path.
- On-the-Fly Path Rendering:
- The map layer instantly calculates and renders a thick, high-contrast route path overlaying the geographical road and trail networks.
- Routing Profiles:
- Users can switch routing profiles directly from the sidebar:
- Road (Шоссе): Prioritizes paved asphalt, fast public roads, and avoids gravel.
- MTB (Маунтинбайк): Prioritizes dirt tracks, singletracks, forest trails, and gravel paths.
- Gravel (Грэвел): Balanced routing profile optimizing for secondary gravel trails, minor paved roads, and unpaved sections.
- Users can switch routing profiles directly from the sidebar:
- Rich Telemetry Panel:
- Once a route is calculated, the sidebar expands to render real-time summaries:
- Total distance (in kilometers).
- Elevation profile (gain and loss in meters) with an interactive SVG chart.
- Detailed road surface breakdown percentage (e.g.,
asphalt: 70%,gravel: 30%).
- Once a route is calculated, the sidebar expands to render real-time summaries:
🏗️ Technical Architecture & Key Files
🖥️ Frontend Architecture & State Management
- UI widgets:
apps/web/src/widgets/map-canvas/ui/MapCanvas.tsx(handles click listeners, MapLibre GL layer bindings, waypoint marker instances).apps/web/src/widgets/planner-sidebar/(handles profile pickers, mileage telemetry, and elevation charts).
- State Management:
- Zustand Routing Store:
usePlannerStorelocated inapps/web/src/entities/route/model/plannerStore.ts. - Slice Fields:
waypoints: Waypoint[](list of placed nodes with coordinates, indexes, and custom IDs).profile: BikeProfile(enum value:'road' | 'mtb' | 'gravel').route: RouteResult | null(current calculated route LineString and metadata).globalRoutingMode: 'auto' | 'manual'(switch to toggle off-grid path building).isRoundTrip: boolean(routes back to start via intermediate coordinates).isOutAndBack: boolean(doubles path back through exact waypoints).
- Helper Utilities:
plannerStoreHelpers.ts(calculateUpdatedWaypoints,calculateCascadedWaypointsfor cascade index corrections).
- Zustand Routing Store:
🔌 API Integration & Communication
- API Client:
apps/web/src/shared/api/client.tstargets the backend routing service. - Backend Hono Router:
apps/api/src/routes/routing.router.tsexposesPOST /api/routing/calculate.- Takes raw coordinates arrays and selected bike profile.
- Queries the local BRouter background engine container/port.
- Returns a GeoJSON
LineStringwith elevation coordinates ([lng, lat, ele]) and surface category attributes.
💾 Database Schema & PostGIS Persistence
- Table:
tracksinapps/api/src/db/schema.ts. - Drizzle Mapping:typescript
export const tracks = pgTable('tracks', {
  id: uuid('id').defaultRandom().primaryKey(),
  userId: text('user_id').references(() => users.id, { onDelete: 'cascade' }),
  title: text('title').notNull(),
  description: text('description'),
  routeGeometry: geometry('route_geometry', { type: 'line_string', srid: 4326 }),
  distanceMeters: integer('distance_meters').notNull(),
  stats: jsonb('stats').$type<{
    distanceKm: number;
    elevationUpM: number;
    elevationDownM: number;
    surfaceBreakdown: Record<string, number>;
  }>(),
  waypoints: jsonb('waypoints').$type<Waypoint[]>(),
  cues: jsonb('cues').$type<CuePoint[]>(),
  colorHex: text('color_hex').default('#3b82f6'),
});
🧪 Test Suite Coverage & Regressions
🔬 Vitest Unit Tests
apps/web/src/entities/route/model/__tests__/plannerStore.test.ts:- Validates waypoint additions, deletions, index cascades, out-and-back calculations, and coordinate reset flows.
🎭 Playwright E2E Tests
apps/web/tests/route-builder.spec.ts:- Test 1:
clicking on map creates waypoints and calculates route(Mocked API responses). - Test 2:
changing profile triggers route recalculation(Asserts changes in surface breakdowns).
- Test 1:
apps/web/tests/waypoint-interactions.spec.ts:- Test 1:
dragging a marker updates the route. - Test 2:
Fit to Route button appears when route exists.
- Test 1:
🚨 Critical Test Gaps
- Cue Sheets E2E Gap: Feature 04 has Turn-by-Turn cue lists implemented but completely lacks Playwright E2E automated layout verification.
- Eraser Canvas E2E Gap: Feature 08 lacks canvas-level click-and-drag marquee interaction tests, only verifying FSM states.
🐞 Known Issues & Resolved Bugs
- Zombie API Port (Resolved): System previously bound BRouter requests to port
8080which often conflicted with pre-existing local node servers. target port was cleanly refactored to query Hono'shttp://localhost:4000/api/routing/calculatedirectly with a clean gateway. - Map Style Diff Loading (Resolved): Rapid component mounts caused the Map canvas to render before MapLibre GL stylesheet buffers completed loading, causing canvas crashes. The layout now utilizes asynchronous style state wait-guards before binding layers.
👣 Step-by-Step Manual Verification
- Start development servers:bash
pnpm run dev - Open your browser and navigate to
http://localhost:3000. - Left-click anywhere on the map grid. Confirm a green marker with a "Start" icon is created.
- Left-click another spot on the map. Confirm a red marker is created and a thick blue path line instantly overlays the roads.
- In the sidebar panel, click Select Profile and change it from "Road" to "MTB". Observe the path recalculating and adapting to trail lines.
- Click Expand details at the bottom, and observe the surface type breakdown and the elevation chart rendering.